Showing posts with label PC Gaming. Show all posts

Wednesday, August 7, 2013

The Strange Case of Creative's X-Fi Randomly Uninstalling Itself

Flashback to January of 2012. That's when I first put my old Creative X-Fi platinum into my office PC.  Although, like most (if not all) modern Motherboards, mine had on-board audio, I still wanted to install the X-Fi. For one, I liked the fidelity. For another, I liked the break-away box I could install in the front of the case; it gave me a wider variety of connections. Stereo aux-in RCA jacks, MIDI-in and MIDI-out connectors, a quarter-inch headphone and stereo mic/line-in jacks with volume control, plus coaxial and optical S/PDIF inputs and outputs. Oh my.

I've had this setup for awhile and eagerly installed it into the new PC. Everything seemed to install fine (and due to past experiences with Creative drivers causing BSOD, this was a good thing), when, a day later, I noticed that I had no sound. Looking into Sound properties of Windows 7 I could plainly see the "speakers" output was missing. I uninstalled the X-Fi from device manager, rebooted, and everything was back. Besides my settings, of course.

And so began the vicious, frustrating cycle. Well, maybe not vicious... but definitely frustrating.

I tried to figure out what was going on to no avail. Installed the latest drivers, etc. Still from time to time (and with seemingly greater and greater frequency) a reboot would mean I was in the soundless Gulag. Granted, I got a little smarter and, instead of rebooting, I just right-clicked Sound, Video, and Game Controllers in device manager and selected Scan for Hardware Changes. This circumvented the rebooting step but still amounted to a major pain.

I gradually learned to live with it. Occasionally, I'd scour the internet in nerd rage to find some seemingly sensible answer, and time and time again I'd end up (eventually) with no sound. As time rolled on,  my attempts became fewer and fewer; my resolve less solvent. I had regulated my self to the cold, bitter winters of creative re-install land. I had given up.

So almost a year and a half later it happened again. Nothing new there. But something bubbled up within me. Perhaps because it was late. Perhaps because I was sick of being bullied by this hunk of silicon. Or maybe a little of both. I screamed, "Enough!" and decided that I was going to solve this once and for all or relegate the card (and break-away box) to the bin. Either way, I had no plans of letting this cycle continuing any further.

Well unlike my previous searches, I found more info on it. First that I was not alone. And second, it seemed to have something to do with the Creative driver (yeah, not surprised) and  having an SSD. Wow. Leave it to Creative to party like its 1998 with an outstanding driver issue on new but not so new hardware.

 I worked through every post on the Creative thread. All 560 of them. Within were a lot well meaning community provided answers which included different drivers, different uninstall procedures, and even programs to change the driver load order. Nothing worked. I thought I'd try one last thing, and then throw the white flag. I figured I'd move the windows swap file from its place on the SSD to one of my mechanical HDD data drives. I don't know what made me think of that -- probably because it was 4am -- but I figured why not. So I moved the swap file from my SSD to my mechanical HDD.

You know what? It worked. It's been two weeks and nary a re-install in Creative land. I've been basking in the warm glow of constant sound since.

Any repercussions to moving the swap you might ask? I don't think so. If anything, it will prolong the the life of your SSD drive (although the amount might not be too significant). Some people even suggest running without one with machines that contain large amounts of physical RAM -- though I didn't want to do that.

So without further ado, here is a step-by-step of changing your swap file location. I won't be going over how to uninstall/install the creative driver. If you are here, you know how to do that oh too well. And because I never. Want to. Do that. Again. Not even in my mind's eye.


  1. Install the Creative Drivers so they are installed and working. I'm using the SBXF_PCDRV_L11_2_18_0015A drivers for Windows 64-bit.
  2. Click on the Win 7 Orb -> Right-click Computer -> Properties...
  3. In the left pane, click the Advanced Settings link.
  4. Choose the Advanced tab, and in the Performance group box click the Settings... button.
  5. In the Performance Options dialog, select the Advanced tab. Click the Change... button located in the Virtual Memory group box.
  6. This is where the magic happens. (1)Uncheck the Automatically manage paging file size for all drives check box. Select your C drive from the list box (pictured). (2)Select the no paging file radio button. (3)Click the Set button.
  7. Still in the Virtual Memory dialog, select the mechanical HDD you have (in my case, E). Select the System managed size radio button. Click the Set button.
  8. Click Ok 3 times to dismiss all the dialogs. Reboot your machine and enjoy not reinstalling those freaking drivers and trying solutions as, Brian Fantana would say, "60% of the time works everytime."

Saturday, May 4, 2013

The Living Room PC, User Shells, and the Long Logoff Goodbye...

The Turing Box, my HTPC, lovingly named after mathematician
 and computer scientist Alan Turing

In a past post I mentioned that I was building an HTPC of which the lion's share of purpose was going to be towards living room gaming. One of my goals of the project was to create a device that was going to resemble more of a living room appliance (but of which I had full control) than a personal computer. To accomplish this, I removed the Windows branding, changed the login background screens to an image of my own choosing, and even created a custom startup animation (pictured above).

The last piece of the puzzle was removing windows explorer altogether when the user logged in. The visible effect of this is when logging in the user no longer sees the desktop, but instead only sees the application that runs as a shell. Why would one want to do this?

  • Performance - By having this program be the only one running (besides some windows services), it will have majority use of windows resources. This also cuts down on a lot of windows activity that comes along with launching explorer.
  • Start Time - The start time of the program (as a shell) is near instant.
  • Stability - As the only application running, the chance of conflicts decrease.
  • Clarity - When the user goes straight to the shell there isn't any discerning of purpose; you are up and running!
  • Cool Factor - It's just extra geeky cool to build your own appliance!

Now to accomplish this you have to substitute another program as a shell. In this you have a couple of options. You can replace the complete shell or on a by user basis. The complete shell wasn't really what I wanted to do, I wanted the logon screen to be present. I just wanted each user to have a separated shell or concern. Basically, on the Turing Box your "users" are nothing more than buttons to start an activity.

Some of the activities on the Turing Box

So next I'll explain how I setup one activity, "Play," on the box. I'll then talk about a nasty bug I ran into that took trial and error to figure out. Keep in mind this isn't a detailed tutorial, just a discussion about the major things I changed. I won't go into the customization of login background screens or startup animations... maybe in another post!


Setting Steam as the Alternate Shell

NOTE: This article talks about changing your registry. Only attempt if you really do know what you're doing (or could care less about wrecking your PC). Even then, proceed at your own risk. There really isn't anything in here that *should* be that dangerous, but I've seen people dazzle with how much damage they can dole out with seemingly no opportunity.

First things first, you should have one administrator account which is active and not part of these shenanigans. I make the other accounts, normal user accounts. This is to enforce the principle of least privilege for both security and consistency (each of these activities is a concern, or task, and none of them involve installing software). 

So, from within your "Play" account launch Steam and start it in Big Picture Mode (using the "Big Picture" button in the upper right hand corner of the Steam interface). Click the Gear Icon ("Settings") and then select the Account menu item. Finally check the "Start Steam in Big Picture Mode" option.

Setting Steam to start in Big Picture Mode

Note that I am participating in the beta. You don't have to but, at least currently, I'd recommend it. There is a Direct3D bug, causing frequent crashing of the steam client,  that was introduced to Windows 7 through the IE10 install (whether or not you use the browser) and the latest beta client corrects for that. Ok that's it for Steam. Now on to the registry!

It's important that you change the registry key while logged into the "Play" user account. You'll be changing the HKEY_CURRENT_USER key and you wouldn't want to change the wrong one! Go ahead and open regedit (WinKey+R -> type "regedit" without the quotes).

Obviously at this point you'll want to back up your registry. Browse to and export the following key somewhere safe.

[HKEY_CURRENT_USER\Software\Microsoft\Windows NT\CurrentVersion\Winlogon]

In this key you will want to create a new string value and name it "Shell" (without the quotes).

Add the Shell String Value
Now, Double click on the "Shell" value and add the path to the Steam client. For example:

C:\Program Files (x86)\Steam\Steam.exe

And that's it! If you log off and log on as "Play"  it should go straight to Steam in Big Picture Mode. Now here are a couple of things to keep in mind:


  • Steam right now doesn't have a "Log off" feature from the GUI's power menu. To log off, Press CTRL+ALT+DELETE and select Log off from the menu.
  • To temporarily bring up a desktop (say if steam crashes and all you have is a black screen), simply press CTRL+ALT+DELETE, and start task manager. Click the "New Task..." button on task manager and type "explorer" (without the quotes) followed by enter. That will get you a desktop. Note: In newer versions of windows, this might not be possible to bring up explorer in this way. If you experience this, simply open regedit and change the key to "xShell" signout and sign in and you should see explorer. When done change back to "Shell" signout/sign in. 
  • At any time if you want to restore explorer as the shell, go to the key above logged in as the "Play" user (and be careful that it is the key above), select the shell key value (it should have that Steam path) and delete it. When complete there should not be a value called "Shell" at all there. Log off and log back on and you should be back to the usual Redmond experience!

Logging off is so hard to do...

And that brought me to the proverbial fly in the ointment. Everything was working swimmingly... until I logged off. It took forever. How long varied, but it took over an hour at one point! This behavior did not occur when I logged off with explorer as the shell.

I tried so many things to find out what this was. But every rain dance I tried yielded no, well, rain.

Finally I started from scratch and did a clean boot. This is where you launch msconfig.exe, hide Microsoft services and disable everything. It worked! The log off was under five seconds. I then proceeded to add back in the startup processes and then the services, one by one until it failed. It was the last service. I kid you not. The culptrit? The Broadcom Wireless LAN Tray Service. I disabled this and everything worked as expected!


Last Thoughts

And there you have it. For each user you want to add simply repeat these steps adding a different exe for the shell and you should be good to go. A word of advice if it is a browser: use Firefox and not Chrome. Chrome doesn't render pages properly without explorer running. Not only does firefox render fine, it is naturally written to behave as you would expect in a sort of "Kiosk" mode.

Hopefully this helps you on your quest for the perfect living room PC experience. Happy shelling!

Friday, April 26, 2013

Dealing with old Saves in Bioshock Infinite


I feel a little compelled to say some things myself about Bioshock Infinite, but for now I wanted to share this tip (which I learned the hard way). One thing that is painfully obvious is Papa Bear Levine went without Save Anywhere or Quick Save. What's worse is that you can only do one playthrough at a time. You can save off your current saves (in Steam) by turning off cloud sync in steam AND the game's options and copying off the folder:

[steam install folder]\userdata\remote\[Your Profile ID (a Number)]\8870\remote\savedata\

But what you might notice (when you copy these saves in) especially after a new install, is that when you start a game "Continue," in the gameplay menu, is grayed out. This has to do with the file dates being older than the current date. To get your save to work:

  1. Go to [steam install folder]\userdata\remote\[Your Profile ID (a Number)]\8870\remote\savedata\
  2. Copy off any files you want to save here and then copy in your old saves you want to use. Sort by date.
  3. The one on the top is the newest (or should be) memorize that file name.
  4. Open a command prompt (WinKey + R and then type cmd and hit enter).
  5. In the command prompt, change directories (cd) until you have found thesavedata folder above.
  6. Type copy \b [FileName memorized in step 3].sav +,, (This is sort of the DOS equivalent of the linux touch... and yes, the +,, is necessary)
  7. Hit enter.
  8. You should see that the filename you memorized in step 3, but with a more current date... and "Continue" should now be actionable. 
Now, find the girl and wipe away the debt.

Thursday, December 20, 2012

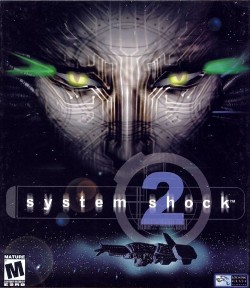
System Shock 2: Spend the holidays with the Many
(They love you more than your family anyway)


System Shock 2 was, in my opinion, a watershed moment in pc gaming. It (and later, Deus Ex) had the gall to join many game styles into one wonderful narrative experience at a time when it was a firm belief that these were divergent styles of play. Take one part FPS, one part adventure game, 1/2 part role playing game, throw in a dash of survival horror, place in your deep space oven at 2.7 Kelvin for 20 minutes and voila! System Shock 2 will greet you you with a sardonic Shodan laugh. Hacker.

For me the "deep space oven" was Amazon. It was the first non-book product I ever bought from there and, if memory serves, I think it was in the first wave of PC software that you could by from the book selling giant (inject dinosaur sounds here). When it arrived I happily stared at the packaging, and quickly installed. What followed was many fun hours of running through the halls of the Rickenbacker and the Von Braun.

That's not to say that, by today's standards, the game doesn't have some warts. It doesn't run well in Windows 7 (if at all), doesn't support widescreen, the movie playbacks fail, patches are hard to find. That is until a mysterious poster named 'Le Corbeau' posted on the French forum Ariane4Ever. There have been a lot of fixes, over the years, for this beloved game. Texture upgrades, unofficial fixes and such. But this "patch" rolls them up in one easy to use package. Plus the cloak-and-daggerness of this mysterious poster just offering it up out of nowhere gets the mind racing in conspiracy based thoughts: Was this an original developer? Was he or she circumventing Electronic Arts and trying to fix this game? I don't know. But what I do know, is that it works.  I'm going to provide a very short guide on how to use this and other patches to get this working on your system at the end of this article.

I got this running and enjoyed watching, with new eyes, as my girlfiend started her journey. For so long the sound effects of the Rickenbacker were relegated to notifications on my phone (and I have to admit for a few minutes as she clicked on door releases I instinctively wanted to check my phone for text messages), but now I got to hear them again as they were intended. In all their System Shock goodness. So without further adieu (pun intended), here is the guide:

Ok, obviously, you'll need the game. Do not run the installer. From the CD-ROM, extract the contents of the shock folder as sshock2 somewhere. On Windows Vista/7 it is important to copy this to the root and not into the "Program Files" directory. I was able to copy mine into "C:\Games" and it worked fine but I believe some have had trouble with long file names and, believe it or not, this game was built for Windows 98... which was still layered on DOS (inject dying dinosaur sounds here).

First download the mods listed at the end of this article. Come back here when you are done. This article doesn't talk about using the SS2 Mod Manager, but instead just discusses manually installing the mods.

Next the aforementioned awesome patch has been included into the equally awesome SSTool. Run it and it will install the official and unofficial patch. This will also create a folder in the directory called "PermanentDataFolder" which is where you will want to install the texture/model upgrade mods.

Now that you have installed the patches with SSTool, you will be able to extract the mods to beautify the game. How this works is you will open an archive and extract the contents into the PermanentDataFolder located in the sshock2 folder. Keep in mind that the order of which archives you extract first are important and, when it prompts to overwrite files, say "Yes" or "Yes to all."

This is the order of extraction you will want:
  1. SHTUP
  2. Rebirth
  3. ADaOB
  4. Tacticool Weapons (any order for these zips)
You should be able run System Shock 2 at this point. How easy was that?!? But before you start there is one more modification you may want to make...

And that modification is to create a user.cfg file to change how the game plays. This is something that was added with the last official patch. Some mechanics that some people weren't thrilled by was the random spawning of enemies and periodic degradation of weapons. You might love those things... or you might be one of those people who don't. If you count yourself among those who like to catch your breath every once in awhile (there are parts where spawning will continue, no matter what you do), create a text file and paste these contents into it:

[OPTIONS]
/s
/n="System Shock 2"
[REQUIREMENTS]
no_spawn
gun_degrade_rate 0

You might want to tweak the gun_degrade_rate variable to taste. "0" means no degradation happens at all while "1" means weapons degrade at the normal rate. "0.5" would then be halfway between the two. Obviously not including an option will result in that option behaving as intended by the original devs (omitting no_spawn, for example).   After you are satisfied save it as user.cfg (make sure you have windows not set to hide extensions of known types or notepad will append an invisible ".txt" to the end. In Windows Explorer -> Organize -> Folder and Search Options -> View Tab and uncheck "Hide extensions for known file types"). Copy this file into the sshock2 folder.

That's it! You can now double click on sshock2.exe and you should be good to go. As an added "retro" plus, you might want to add it as a "non-steam shortcut" to your steam library. If you do that, and rename it to "System Shock 2," you will blow your friends minds as they see your status as "In-Game System Shock 2."

I hope this post was helpful. Enjoy the game that inspired Bioshock, and revel in the fun that can be had in just a few hundred megabytes totaling to a story created over 13 years ago.

And, of course... Happy holidays pathetic insect.


All files show latest version as of time of this article.

[: Patcher :]

SSTool v4.4

[: Textures :]

SHTUP Beta 6

[: Lighting :]

ADaOB v0.3.0

[: Models :]

System Shock 2 Rebirth v02.7
Of these you will want:
  •  TC_Pistol_ADaoB028-compatible_v1.1b.ss2mod (Rename this to .zip!!)
  •  Tacticool_Wrench_Replacement_v1.0.zip
  •  Tacticool_Shotgun_Replacement_v1.0.zip
  •  Tacticool_Laser_Pistol_Replacement_v1.1.zip
  •  Tacticool_Assault_Rifle_Replacement_v1.0.zip
  •  Tacticool_Grenade_Launcher_Replacement_v1.0.zip


Tuesday, September 25, 2012

[: PC in a Shoebox :]

UPDATE: I've since replaced the LG Electronics DVD drive with a Panasonic Blu-ray one and added a Samsung 840pro SSD for the data drive (relegating the WD HDD to a backup drive). This is reflected below.


So in comparing the PC apple to the console orange there are really only a couple of categories you must award an edge to the Console (which is, of course, itself a budget PC): Price, and the "couch factor."

Price is actually a little dicey. It's more like a "buy-in" price, where the console wins. If you start looking at things like cost of ownership and maybe a price per value kind of thing, the PC starts to get a lot more competitive. A PC is ready to customize. Dying to be customized, in fact. This versatility might make its money back to its owner as you can use it for a myriad of things, in literally any way you want to. Coupled with digital distribution game sales on platforms such as Steam, the PC allows their owners to buy games at a much cheaper rate (due to the lack of royalty on the Windows platform) than its console brethren.

The "couch factor" as it were, allows for you to play video games slumping on your couch, with Doritos stained orange fingertips mashing on a controller as -- according to many -- God intended. I'm not always the biggest fan of this idea, in part, due to the fact the controllers just don't have the resolution that the keyboard/mouse combo have. I also am not a fan of the lower resolution on TVs, and the speed of the hardware found on today's aging consoles. But even after saying all that, there is a real argument here; sometimes you just want to slump in front of the TV and play your games. That, and if you want to make this a social thing, particularly in sports games... it really is a better experience.

So I wanted to have my Doritos cake and eat it too. I did not want to sacrifice quality for the "buy-in" price of a console and was quite willing to invest in a mini-living room PC that would provide gaming, media, and more. And so began my quest to build the shoebox PC!

First, in this example I'm shelling out a decent amount of dough. As I said, I wanted to future-proof this purchase.

[: The Shopping List :]

SilverStone SST-SG08B Black  Mini-ITX Desktop Computer Case 600W Power Supply
ASUS P8Z77-I Deluxe LGA 1155 Intel Z77 Mini ITX Intel Motherboard
Intel Core i7-3770K Ivy Bridge 3.5GHz (3.9GHz Turbo) LGA 1155 77W Quad-Core
(2) CORSAIR Vengeance LP 8GB 240-Pin DDR3 SDRAM DDR3 1600
EVGA GeForce GTX 670 FTW 2GB  Video Card
Kingston HyperX 3K SH103S3/240G 2.5" 240GB Internal Solid State Drive (SSD) (System Drive)
Samsung Electronics 840 Pro Series 512gb SSD (Data Drive)
Western Digital Blue WD10EALX 1TB 7200 RPM SATA 6.0Gb/s 3.5" HDD (Backup Drive)
Logitech Wireless Combo MK260 920-002950 Black USB RF Wireless Standard Keyboard and Mouse
LG Electronics - Slim DVD±RW Drive
Panasonic UJ240 6x Blu-ray Burner BD-RE/8x DVD±RW Drive
Microsoft Windows 7 Home Premium SP1 64-bit - OEM

So you can see cost could be easily trimmed on memory, storage, and even processor model. But if you want to be an enthusiast, go big!

The items on the list that really "make" a mini-pc are the case and the motherboard. And in this setup I went with the Silverstone SG08B for the case and the Asus P8Z77-I Deluxe for the motherboard.

The Silverstone case dimensions are quite small at 8.75" x 7.49" x 13.82" (WxHxD), and it's black aluminum finish allow it to fit in aesthetically quite easily with other home theater components. It uses a positive pressure system: a single 180mm fan on top of the case blows air through the case and pushes out through the side venting. Early on I decided to use stock cooling (as this was not going to be an overclocked system), so this seemed a-OK with me.  Note: I did see a review where they successfully swapped this fan out with a radiator and closed watercooling system.


All that stuff has gotta go in that little black box

The case comes with a 600W power supply -- more than sufficient for a mini-pc system. It is, unforunately not modular. This seems to be a strange design choice for such a small space! It would be theoretically possible to swap it out with a modular one, but you will have to do your research... it is a tight fit with the video card.


A lot of performance packed into a tiny space

The Asus P8Z77-I Deluxe was chosen for the motherboard do its high performance reviews as a Mini-ITX board and the inclusion of a built in wireless radio. Wires... the natural enemy of living rooms since ancient times. 


[: Putting it all Together :]

Ok so the next step is putting all the pieces together. I was pretty nervous as this was my first Mini-ITX build and, unlike more traditional builds, requires more attention to spatial details. It went pretty fast, actually. I was sick when I did it, so I did a couple of bonehead things along the way
(including using the part that was meant to be discarded for the VGA duct and almost throwing away the actual duct), but I made it through pretty well.

The Asus P8Z77-I Deluxe installed

The first thing I noticed after installing the motherboard was just how tiny it actually was! It went in without a hitch.


Cable management. Early and often

Cable management was one of the hardest things to do in this build. It was a constant process of planning, tying, fitting a component, and the re-evaluating the cable positions.


Already starting to get crazy...
even before the video card is installed
(that groove to the left will be its home)


Gigantic Video Card. Check.

The most challenging component to install was the full sized video card. This was easily the hardest step. After much patience (and by patience, I mean swearing) I was able to install the card from the side and click into place.


Hard drive cage, Slim DVD drive, and fan installed

Finally the HDD cage, fan, and DVD drive were installed. This added the last roadblock; trying to get these components in and cables placed in a way to allow for the case to close properly.


Reporting for duty


[: Temperatures :]

With a mini-case comes hight temperatures. Or do they? Let's take a look.

For GPU stress testing I used Real-Time HDR IBL while for CPU stress testing I used Prime95. The 180mm fan has two settings: High and Low. All tests were run with both fan settings. All temperatures are in Celsius.

CPU Testing

Idle (Fan on Low)

CPU Average 31 (31 33 30 30)

Idle (Fan on High)

CPU Average 29 (29 30 28 28)

Prime95 small fft (Fan on Low)

CPU Average 81 (79 78 81 85)

Prime95 small fft (Fan on High)

CPU Average 79 (77 75 79 83)


GPU Testing

Idle (Fan on Low)

GPU 35

Idle (Fan on High)

GPU 35

[rthdribl.exe] 1720x982 GPU Fan auto (Fan on Low)

GPU 78

[rthdribl.exe] 1720x982 GPU Fan auto (Fan on High)

GPU 78


These temps seem fine for stock cooling. With a TJMax of 105C, definitely nothing to worry about!. The GPU also appears to have very nice temps for such an enclosed space (its safe max is 97C).

We can see that the 180mm settting really only buys about 2C on cpu temps (and none on GPU) so it would be fine in this setup to keep on low and save the noise.

[: Conclusion :]

The only negatives were the aforementioned non-modular power supply and my data drive (WD10EALX) was a little loud in access. This wasn't noticeable with anything that has sound  (games, movies, music) so I'm not too worried about it(No access noise with the new 840 Pro SSD!).

As a major coincidence the very next day after I put this system together Valve released the "Big Picture Mode" for the Steam beta client (an interface designed for High Definition TVs). Talk about meant to be!

Rise... Steam. RIIIIISE!

It looks beautiful on a 1080p TV (although for fidelity nothing beats a good monitor) and thanks to the Steam Cloud, I can play my steam games interchangeably between the two locations.

The budget wireless keyboard/mouse combo I bought works surprisingly well. Although to be safe I disabled the 2.4GHz radio on the motherboard and am only using 5GHz (to prevent interference).

Now all I need to do is invest in a couple of game controllers (for sports games) and a bag of Doritos. Game on!